There’s a moment in every shoot where the standard setup starts to feel predictable. One light. One pose. One outcome. Let’s shake things up.
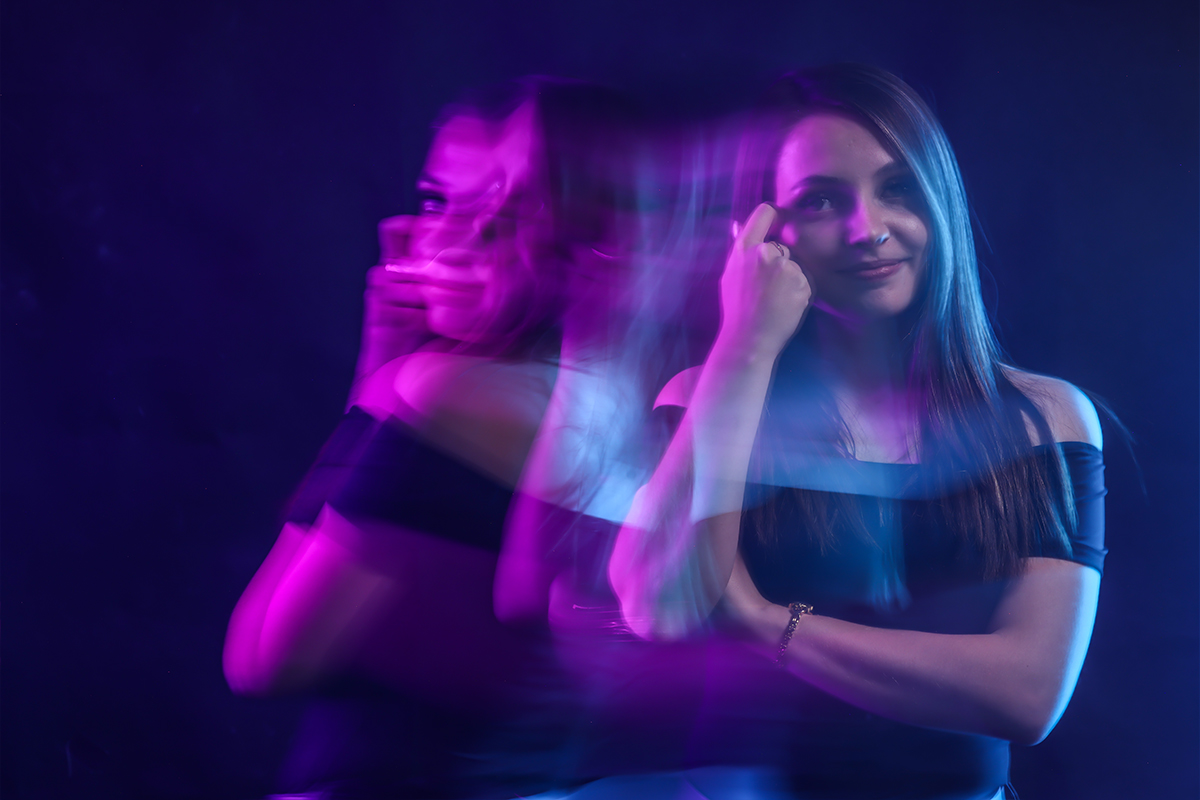
By introducing Luxceo RGB tube lights alongside flash, you’re no longer just capturing a subject, you’re capturing movement, mood, and timing in a single frame.
If you want to see this setup in action, watch our YouTube video here: Painting with Light? Long Exposure Meets Luxceo Tube Magic
In this guide, we’ll break down exactly how the setup works, from your camera settings and lighting placement to timing and movement, so you can recreate the effect with confidence.
Let’s start with the basics: The setup
This technique only works if your environment is predictable.
Start with:
- Camera on a tripod (non-negotiable)
- Dark or controlled ambient light
- One flash to freeze your subject
- RGB tube lights to create motion
Base settings to start with:
- f/8 - f/11 (for sharpness and control)
- ISO 100 - 200 (to avoid unwanted ambient light)
- 1-3 second shutter
- White balance: 5600K
These aren’t fixed rules, but they give you a reliable starting point.
How the effect works
This technique combines two types of light, each playing a specific role in the final image:
Flash freezes your subject instantly, capturing a sharp, detailed moment.
Continuous RGB light records movement over time, adding colour and motion as your subject transitions.
The result is a single frame that holds both precision and motion, a sharp subject layered with controlled, flowing light trails.
When executed correctly, this allows you to create images that feel dynamic and intentional, without relying on editing or compositing.
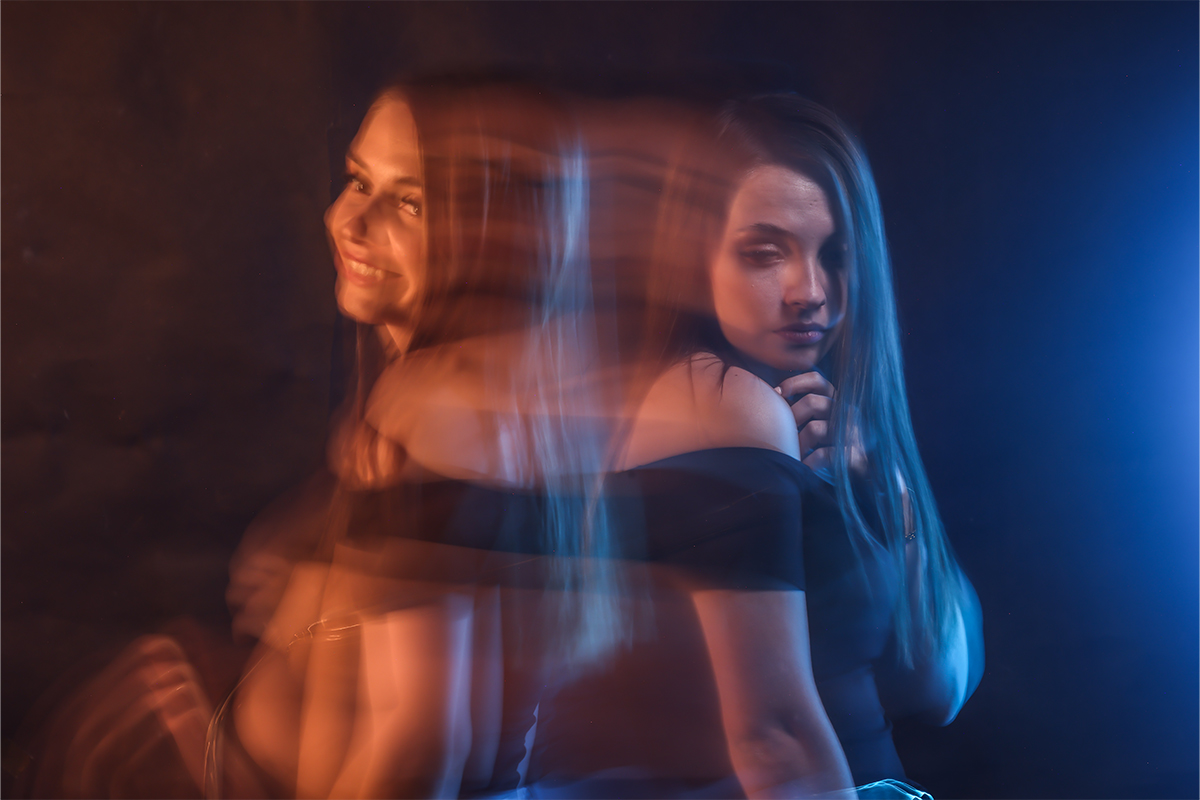
Timing Is Everything
Your subject needs clear direction, otherwise the shot falls apart. Use two marks on the floor:
- Start position
- End position
Then brief them like this:
- Hold the first pose
- Wait for the flash
- Move immediately after
Important tip:
- If they move too early → your subject won’t be sharp
- If they move too late → no motion trail
Expect to repeat this a few times, because timing is a skill, not luck.

5 Practical tips that make or break the shot
- Control your flash power first
If your subject isn’t sharp or properly exposed, nothing else matters. Lock this in before adjusting anything else. - Use contrasting colours
Set your RGB tubes to colours that separate from skin tones (blues, magentas, greens). This makes the motion stand out clearly. - Adjust shutter speed for motion length
Shorter (1s) = tighter motion
Longer (3s+) = more dramatic trails - Direct the movement
Random movement looks messy. Guide your subject: turn, step, or shift with intention. - Keep ambient light low
Too much ambient light will wash out the effect and reduce contrast between sharp and motion areas.
Troubleshooting (Quick Fixes)
- Image too dark? Increase flash power or ISO slightly
- No visible motion? Increase shutter time or RGB brightness
- Motion too messy? Simplify the subject’s movement
- Subject not sharp? They’re moving too early
There’s a point where everything aligns, your timing feels natural, your subject moves with confidence, and your lighting holds balance.
You take the shot and check the frame. A sharp, controlled portrait anchored by flash, layered with colour and motion. At that point, it stops being experimental and becomes intentional.
This technique isn’t just a creative trick. It’s a way to:
- Add motion without compositing
- Create unique portraits in-camera
- Build a recognisable visual style
- Push beyond static lighting setups
It doesn’t replace your current workflow, it expands it. And once you understand the timing, you can apply it anywhere, from portraits to commercial shoots. Try it for yourself and tag us on social media so we can see your results.